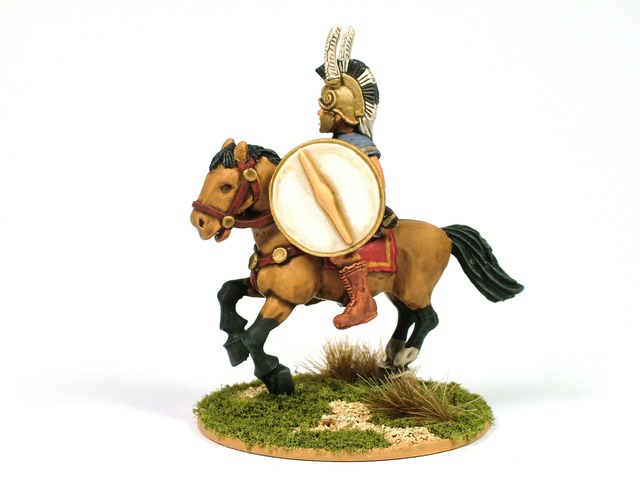
Here is one of Aventine Miniatures' fine Tarentine cavalry models. I decided to give these guys white shields - partly because I thought they'd look good, and partly because, I must admit, I like the cover of the recent Osprey book on the Tarentines (I don't think much of the book overall, to be honest, but more on that another time perhaps). Anyway, one of the drawbacks of the dip is that it makes white look rather mucky. Sometimes this can be an advantage - I don't have any difficulty imagining that anyone wearing a white tunic to a battle is going to look fairly grubby pretty quickly. But sometimes you want to make something stand out - like these shields.
A while ago, whilst shading a batch of figures with Army Painter, I failed to notice a big blobby run down the back of a white tunic, until it was, I feared, too late - i.e. well into the drying process - the figure was still a bit tacky, but the 'dip' wasn't soft enough that I could 'wipe' it away with a tissue or a brush. It looked, frankly, awful, but I really didn't want to have strip and repaint one figure. So, what to do? In desperation, I reached for the pot of white spirit which I use to wash out the brushes I use to apply the dip. I dipped a clean brush into it, dabbed most of the white spirit off on a tissue, and then gently 'damp-brushed' over the run. To my delight, as I brushed over it, it gradually softened and wiped away. I kept going - adding a tiny bit more white spirit, stroking a bit more 'dip' off, wiping that off on the tissue and so on - it takes longer to type than to do. And... When I'd finished there was a nice neat 'highlight' on a fold in the tunic. As none of the rest of the figures had a highlight, I had to do a bit of remedial work with a bit more dip to disguise it a bit, but it did set me thinking.
There are things on my figures that I do apply highlights to - sometimes over the 'dip'. It isn't an ideal process - for one thing acrylic paint doesn't 'stick' to the dip very well; for another, the highlights, without a lot of effort, tend to look quite 'stark' against the soft shading of the rest of the figure. And it slows the painting process down a lot. This method - applying the 'dip', waiting 20 minutes to half an hour or so for it to get 'tacky', then using a brush dampened in white spirit, is very controllable, and allows for a soft graduation between 'dipped' shadow and highlight.
The shield above was painted by this method. White primer, pale brown on the 'spine', gold on the rim, and then a coat of Army Painter 'Soft Tone', which was allowed to dry for a wee while. Then I took a smallish brush (a #0 which had seen better days - it wasn't completely knackered, but the point wasn't good enough for proper painting), a tissue and some white spirit, and set to work removing the 'dip' from an area either side of the spine, to create a highlight, and make the shield as a whole look rather brighter. It'll work on areas other than shields too and on colours other than white too - clothing for instance, but it is fiddly to do then - if you aren't careful you drag the 'dip' out of the shadows as well as off the highlights, and it's quite easy to end up with a 'sharp' edge to the highlight too.
I wouldn't do it on figures painted with enamels - I fancy you'd take the paint off as well as the 'dip', but white spirit doesn't dissolve acrylic paint, so it should be safe enough. Because it's fiddly, and smelly, I don't expect I'll be doing it all the time. But for things like these shields, it's a godsend.